
You want makeup that looks polished without wasting time or product, and a few smart tweaks can change everything. With these Easy Makeup Hacks 2025, you’ll start with the right primer, build a thin base, and use cream color to get that natural glow fast. Then set only where you need it, sharpen your lashes, and fix liner like a pro. A mist, a blot, and a quick refresh keep it all in place. Here’s how to make each step work harder for you…
Key Takeaways from Easy Makeup Hacks 2025
- Map primers by zone (mattify T-zone, luminize high points), match formulas to skincare, and let each layer set 30 seconds to prevent pilling—one of the most effective Easy Makeup Hacks 2025 for a smooth base.
- Build foundation in thin layers from the center outward; sheer with a damp sponge and lightly set movement-prone areas first, another go-to from Easy Makeup Hacks 2025 for lasting wear.
- Conceal strategically: color-correct discoloration, use thin layers, let concealer set before tapping, and blend an upside-down triangle under eyes.
- Apply cream bronzer, blush, and highlighter before powders; tap and roll to blend seamlessly, then step back to check symmetry.
- Set and refresh smartly: powder only where you crease or shine, blot midday, micro-mist in X/T pattern, and press with a damp sponge.
Prime Smart: Grip, Glow, and Oil Control
Before foundation touches your skin, prime with purpose: choose a gripping primer for longevity, a luminizing primer for glow, and a mattifying primer for oil control—sometimes layering them where needed. Map your face first. Place grip where makeup slips—sides of nose, smile lines, chin. Sweep luminizer on high points: tops of cheeks, bridge of nose, and above the brows for a subtle, lit-from-within sheen. Tap mattifier on the T-zone only; avoid cheeks if they’re normal or dry.
Use pea-sized amounts. Warm each primer with clean fingertips, then press—don’t rub—so it bonds to skin. Let each layer set for 30 seconds to prevent pilling. Match formulas to your skincare: water-based with water-based, silicone with silicone. Finish with a light mist to meld everything seamlessly—one of the pro-approved tricks highlighted in Easy Makeup Hacks 2025.
Long-Wear Base: Thin Layers and Strategic Setting
With primer doing the heavy lifting, build longevity with thin, flexible layers. Sheer out your foundation with a damp sponge or a small buffing brush, pressing product in instead of dragging. Start at the center of your face and fade outward so edges stay skinlike. Let each layer settle for 30 seconds before adding more only where you need extra coverage—one of the smart tips featured in Easy Makeup Hacks 2025.
Lock movement-prone zones first. Set the sides of your nose, smile lines, and between brows with a small brush and a minimal veil of loose powder. Then lightly mist, let it dry, and add a whisper more powder only where shine returns. Choose satin or soft-matte formulas if you’re oily; dewier skins can mix a drop of moisturizer. Finish by blotting with a tissue to lift excess, another simple trick from Easy Makeup Hacks 2025.
Conceal Like a Pro: Triangle and Spot Techniques
Even if your base looks smooth, smart concealing sharpens everything. Use a creamy, medium-coverage concealer that matches your skin for spots and runs slightly lighter under eyes. For dark circles, draw an upside-down triangle from the inner corner to the nostril and outer corner; blend edges, keep the center bright. For blemishes, pinpoint conceal: dab, let it set 20–30 seconds, then tap with a tiny brush. Don’t drag—precision is key in Easy Makeup Hacks 2025.
- Neutralize discoloration first: peach for blue-purple under-eyes, green for red spots.
- Set only where you crease or need longevity; press, don’t sweep.
- Keep layers thin to avoid texture, another go-to trick from Easy Makeup Hacks 2025.
| Need | Feeling | Fix |
|---|---|---|
| Tired eyes | Dull | Triangle lift |
| Red blemish | Self-conscious | Spot tap |
| Uneven tone | Frustrated | Targeted blend |
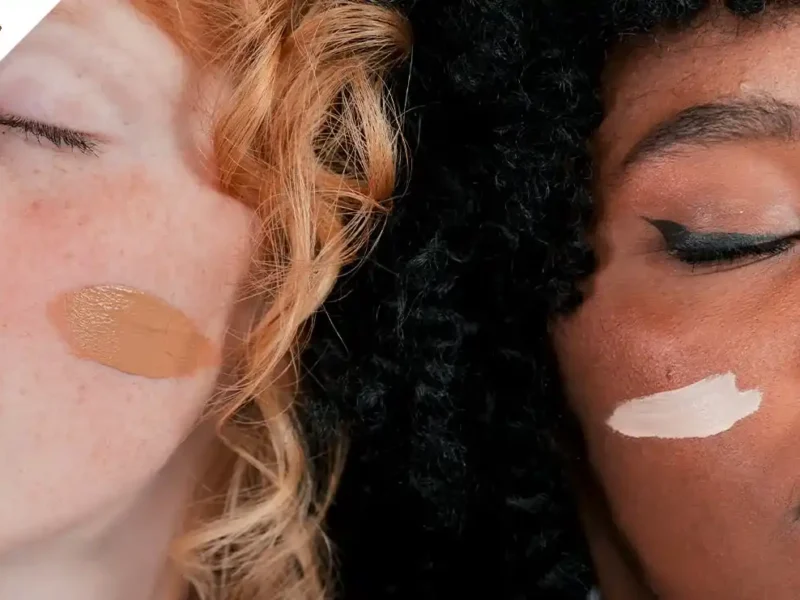
Creams First: Blend for Seamless Color
Although powders have their place, start with cream products to melt color into skin and avoid patchiness. Cream textures mimic skin’s natural finish, so blush, bronzer, and highlighter fuse together without harsh lines. Choose formulas that match your undertone and warm them between fingers to boost slip—an approach highlighted in Easy Makeup Hacks 2025.
Apply cream bronzer where the sun naturally hits—temples, cheekbones, and jawline—then blend upward with a damp sponge. Tap cream blush onto the apples and sweep toward the ears for lift. Press cream highlighter on the high points, focusing on the tops of cheekbones and bridge of the nose.
Work in thin layers and build gradually. Use tapping and rolling motions instead of swiping to keep coverage intact. Step back between layers to check balance and symmetry, another pro-approved trick from Easy Makeup Hacks 2025.
Set Strategically: Powder Only Where Needed
Set only the zones that crease or shine so your skin keeps its natural glow. After your creams set, target powder strategically: press it into the T‑zone, under‑eyes, smile lines, and around the nose. Leave cheeks and high points dewy so dimension stays intact. Use a small brush or puff, not a big fluffy brush, to avoid dusting product everywhere.
| Area | Tool | Technique |
|---|---|---|
| Under‑eyes | Velour puff | Press, don’t swipe |
| T‑zone | Small brush | Light, repeated taps |
| Smile lines | Puff edge | Fold, press into creases |
Choose a finely milled, translucent formula for minimal texture. Oily skin? Add a touch more to the center; dry skin? Powder only where concealer moves. To refresh later, blot first, then re‑press powder so you don’t cake.
Brow Blueprint: Map, Fill, and Lift
Before you pick up a pencil, map your brows so every stroke has a purpose. Hold a thin brush from the side of your nose to the inner corner for the start, across the iris for the arch, and to the outer corner for the tail. Lightly mark those points. Now you’ve got a blueprint.
Map your brows first: mark start, arch, and tail for purposeful strokes.
1) Feather in hairlike strokes with a fine-tip pencil, keeping pressure minimal at the front and building toward the arch and tail. Follow your natural growth for a believable shape.
2) Soften edges with a spoolie. Blend upward at the front, then out toward the tail to diffuse any harsh lines.
3) Lift with subtle contrast: trace beneath the brow with a skin-tone pencil or concealer, then set with a clear or tinted brow gel.
Lash Upgrade: Curl, Coat, and Comb
Lashes are architecture: structure first, then finish. Start by curling at the base, pulse once, move to the middle, pulse again, then tip. Warm the curler slightly with a blow-dryer for two seconds; test on your wrist, then curl for lift that lasts.
Prime if your lashes droop or are sparse. Wiggle mascara at the roots to anchor, then pull through. Use a lengthening formula first for separation, then a volumizing coat for body. Rotate the wand vertically to detail inner and outer corners. Remove excess from the wand on a tissue to avoid clumps.
Before it sets, comb through with a clean spoolie or lash comb from root to tip. Pinch tips lightly with fingers to fan. Let dry, then add one final defining pass.
Liner Fixes: Tightline, Flick, and Clean-Up
Even if your hand isn’t steady, you can master liner by working in smart, small moves. Anchor your elbow on a table, tilt your chin up, and look down into a mirror so your lash line’s flat. Use a waterproof pencil for control, then layer gel or liquid for polish.
Steady or not, master liner with small moves: anchor, tilt, look down, pencil first, polish with gel.
1) Tightline: Gently lift your lid and press pencil between lashes, not on the waterline. Use short dashes from outer to inner corner, then wiggle through roots to fill gaps. Set with a matching shadow to lock it.
2) Flick: Map the wing from your lower lash line toward the tail of your brow. Sketch a tiny triangle, fill it, then connect to the lash line with micro-strokes.
3) Clean-Up: Sharpen edges using pointed cotton swabs dipped in micellar water, then seal with concealer.
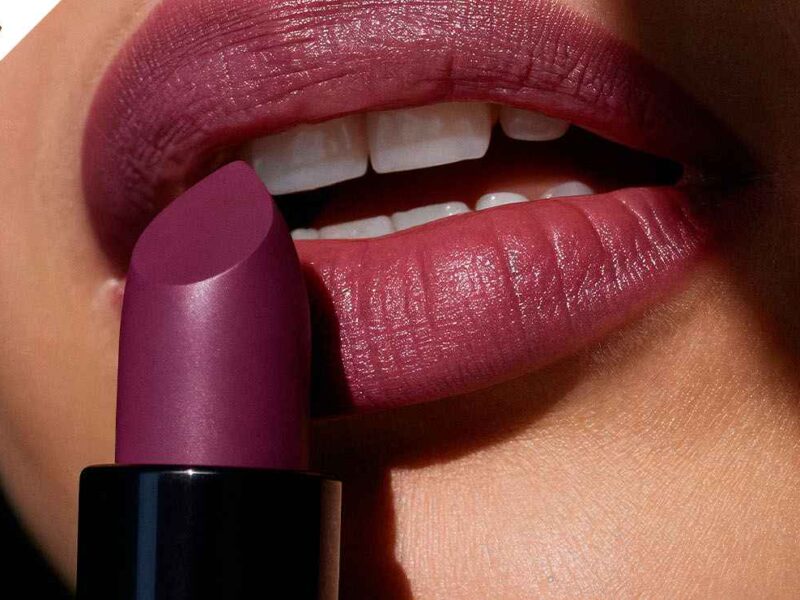
Multi-Task Your Products: Lip, Cheek, and Eye
While you don’t need a full kit to look polished, you do need flexible formulas. Reach for creamy, blendable products that move from lips to cheeks to eyes without pilling or patching. Dab a satin lipstick on your lips, tap the excess onto cheeks, then sweep the leftover color across lids for instant harmony. Use a balmy contour stick as a soft eyeshadow and cheek sculpt, then pat clear balm on lids for sheen.
- Choose cream-to-satin textures.
- Stick to analogous shades.
- Build thin layers with fingers or a fluffy brush.
| Mood | Shade Idea | Where It Shines |
|---|---|---|
| Fresh | Petal pink | Brunch selfies |
| Confident | Terracotta | Meetings |
| Playful | Coral | Date night |
| Chic | Mauve | Cocktails |
| Cozy | Rose-brown | Sunday errands |
Lock It In: Mist, Blot, and Midday Refresh
Because great makeup needs staying power, lock in your look with a smart set-and-refresh routine. Set strategically, absorb shine without stripping, and revive texture before it breaks down. You’ll keep color true, skin comfortable, and finish polished from morning to night.
1) Mist to set: After foundation and concealer, mist a fine-setting spray in an X, then a T. Press with a damp sponge to mesh layers. Repeat a micro-mist after powder to remove chalkiness and create a flexible seal.
2) Blot, don’t cake: Press blot papers on the T-zone; avoid rubbing. If you’re out, use a clean tissue’s inner layer. Then tap a rice-based powder only where needed.
3) Midday refresh: Rehydrate first—one light mist. Smooth creases with your fingertip, then spot-conceal and re-mist.
Frequently Asked Questions
How Do I Choose Makeup for Sensitive or Acne-Prone Skin?
Choose fragrance-free, non-comedogenic, hypoallergenic formulas. Patch-test new products. Pick mineral or silicone-based foundations, avoid heavy oils, and use gentle, alcohol-free primers. Opt for zinc oxide sunscreen. Clean brushes often, remove makeup nightly, and prioritize soothing ingredients like niacinamide, squalane, and aloe.
What Makeup Steps Are Best for Mature, Textured Skin?
Focus on hydration, gentle exfoliation, and lightweight layers. Use hydrating primer, sheer foundation, and creamy concealer. Tap cream blush/bronzer, avoid heavy powder, and set selectively. Choose satin finishes, soften lines with diffused eyeshadow, define brows, curl lashes, and wear moisturizing lipstick.
How Can I Build a Capsule Makeup Kit on a Budget?
Prioritize multitaskers: tinted moisturizer, cream blush/lip, brow gel, tubing mascara, neutral quad, black/brown liner, sheer highlighter. Choose drugstore dupes, mini sizes, and brush essentials (fluffy, flat, angled). Shop sales, bundles, and return-friendly retailers. Edit shades to your undertone.
Which Tools Are Essential Versus Nice-To-Have for Beginners?
Essential: foundation brush or sponge, fluffy powder brush, blending eyeshadow brush, angled brow brush, eyelash curler, sharpener, and clean fingers. Nice-to-have: stippling brush, fan brush, lip brush, spoolie, precision eyeliner brush, and mini detail brush.
How Do I Match Foundation in Different Lighting Conditions?
Test matches in natural light first; swipe jawline stripes and pick the one disappearing. Check indoor warm and cool lighting, adjust with undertone-correcting mixers. Keep samples, photograph with flash, blend onto neck, and reassess seasonally for shade shifts.
Conclusion
You’ve got everything you need to nail an effortless, polished look daily. Prime smart, build thin layers, and conceal with intention. Blend creams for natural color, set only where you shine, and give your lashes and liner a quick upgrade. Multi-task your products to save time, then lock it all in with a mist and midday blot. Keep your routine light, strategic, and flexible—so you look fresh, confident, and camera-ready from morning coffee to after-work plans.